3D Printing is the process of adhering multiple layers of material together to form a 3-dimensional object. 3D printers accomplish this feat without the need for any human input, aside from the initial creation and downloading of the CAD (Computer-Aided Design) model. Below is a video from Mashable illustrating how a 3D printer works and its applications to real-world scenarios.
As with all technologies, 3D printers have limitations that must be taken into consideration when attempting to print three-dimensional objects. Some of those limitations are listed below:
1) Size: The printer used to print the various parts of the head was the H400. This printer is meant to be primarily used for the creation of small objects, so the CAD model of the head had to be subdivided into eight smaller components that were downloaded to the H400 as separate print jobs.
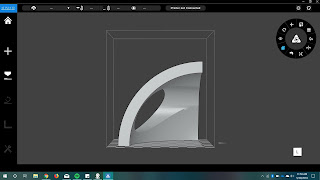
2) Placement: The software used to create the CAD model of the head was Autodesk Fusion 360. However, a different program is needed to tell the 3D printer what to print. The program used for this project was Afinia Studio. After sending the CAD file from Autodesk Fusion 360 to Afinia Studio, the model must be placed on a virtual stage that tells the printer which layers to print first. If the object is placed improperly, the printer will not be able to create an accurate representation of the CAD model.
When placed this way, the printer will add support material to support the overhanging portion of the design. After the job is completed, the support material can be removed, resulting in a successful product.
When placed this way, the printer is less likely to add support material, since the outside surface of the model is convex relative to the xy-plane. As a result, it may struggle to successfully print around the hole, causing unwanted errors around this area.
As with all technologies, 3D printers have limitations that must be taken into consideration when attempting to print three-dimensional objects. Some of those limitations are listed below:
1) Size: The printer used to print the various parts of the head was the H400. This printer is meant to be primarily used for the creation of small objects, so the CAD model of the head had to be subdivided into eight smaller components that were downloaded to the H400 as separate print jobs.
2) Placement: The software used to create the CAD model of the head was Autodesk Fusion 360. However, a different program is needed to tell the 3D printer what to print. The program used for this project was Afinia Studio. After sending the CAD file from Autodesk Fusion 360 to Afinia Studio, the model must be placed on a virtual stage that tells the printer which layers to print first. If the object is placed improperly, the printer will not be able to create an accurate representation of the CAD model.
 |
| Right way to place |
 |
| Wrong way to place |
Comments
Post a Comment